
Wedding - February 10, 2020
All About My Reception Dress
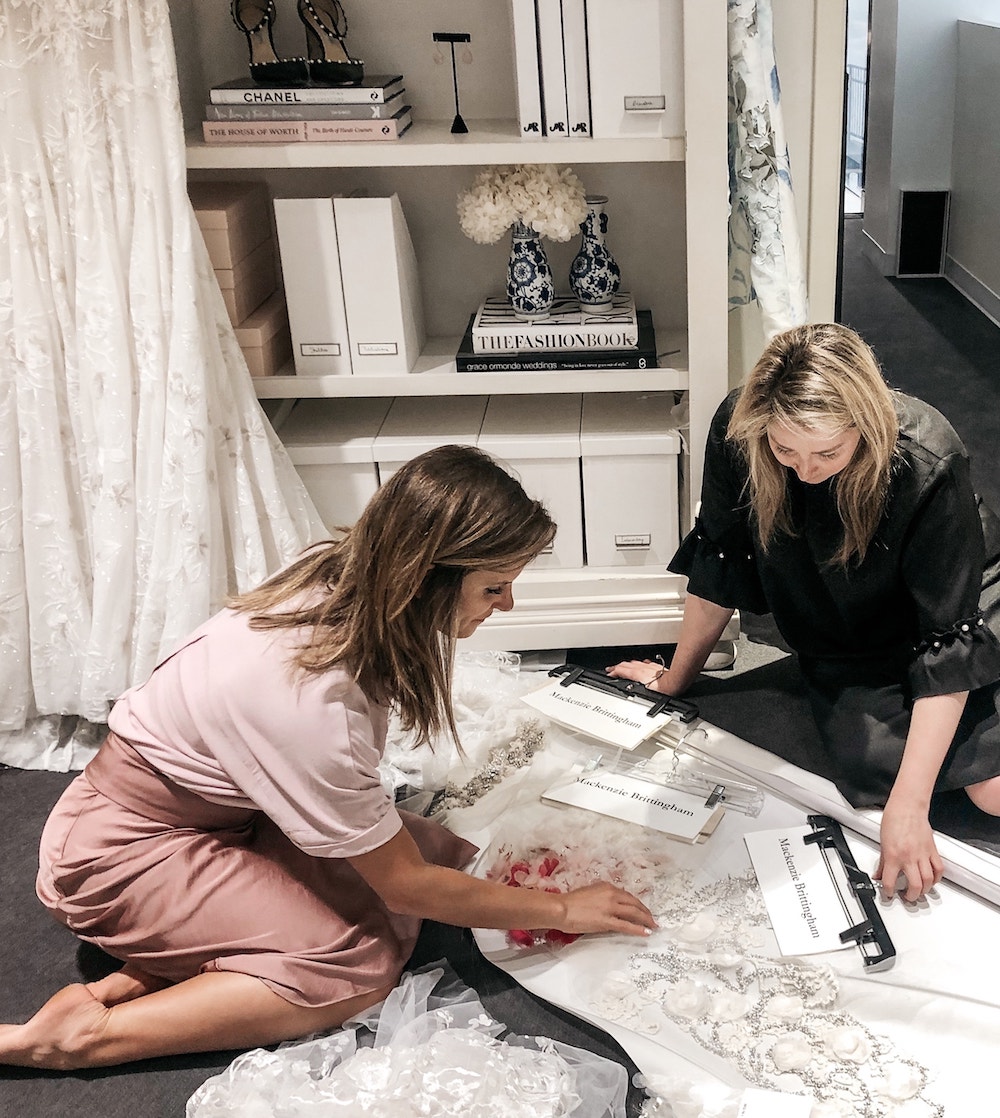
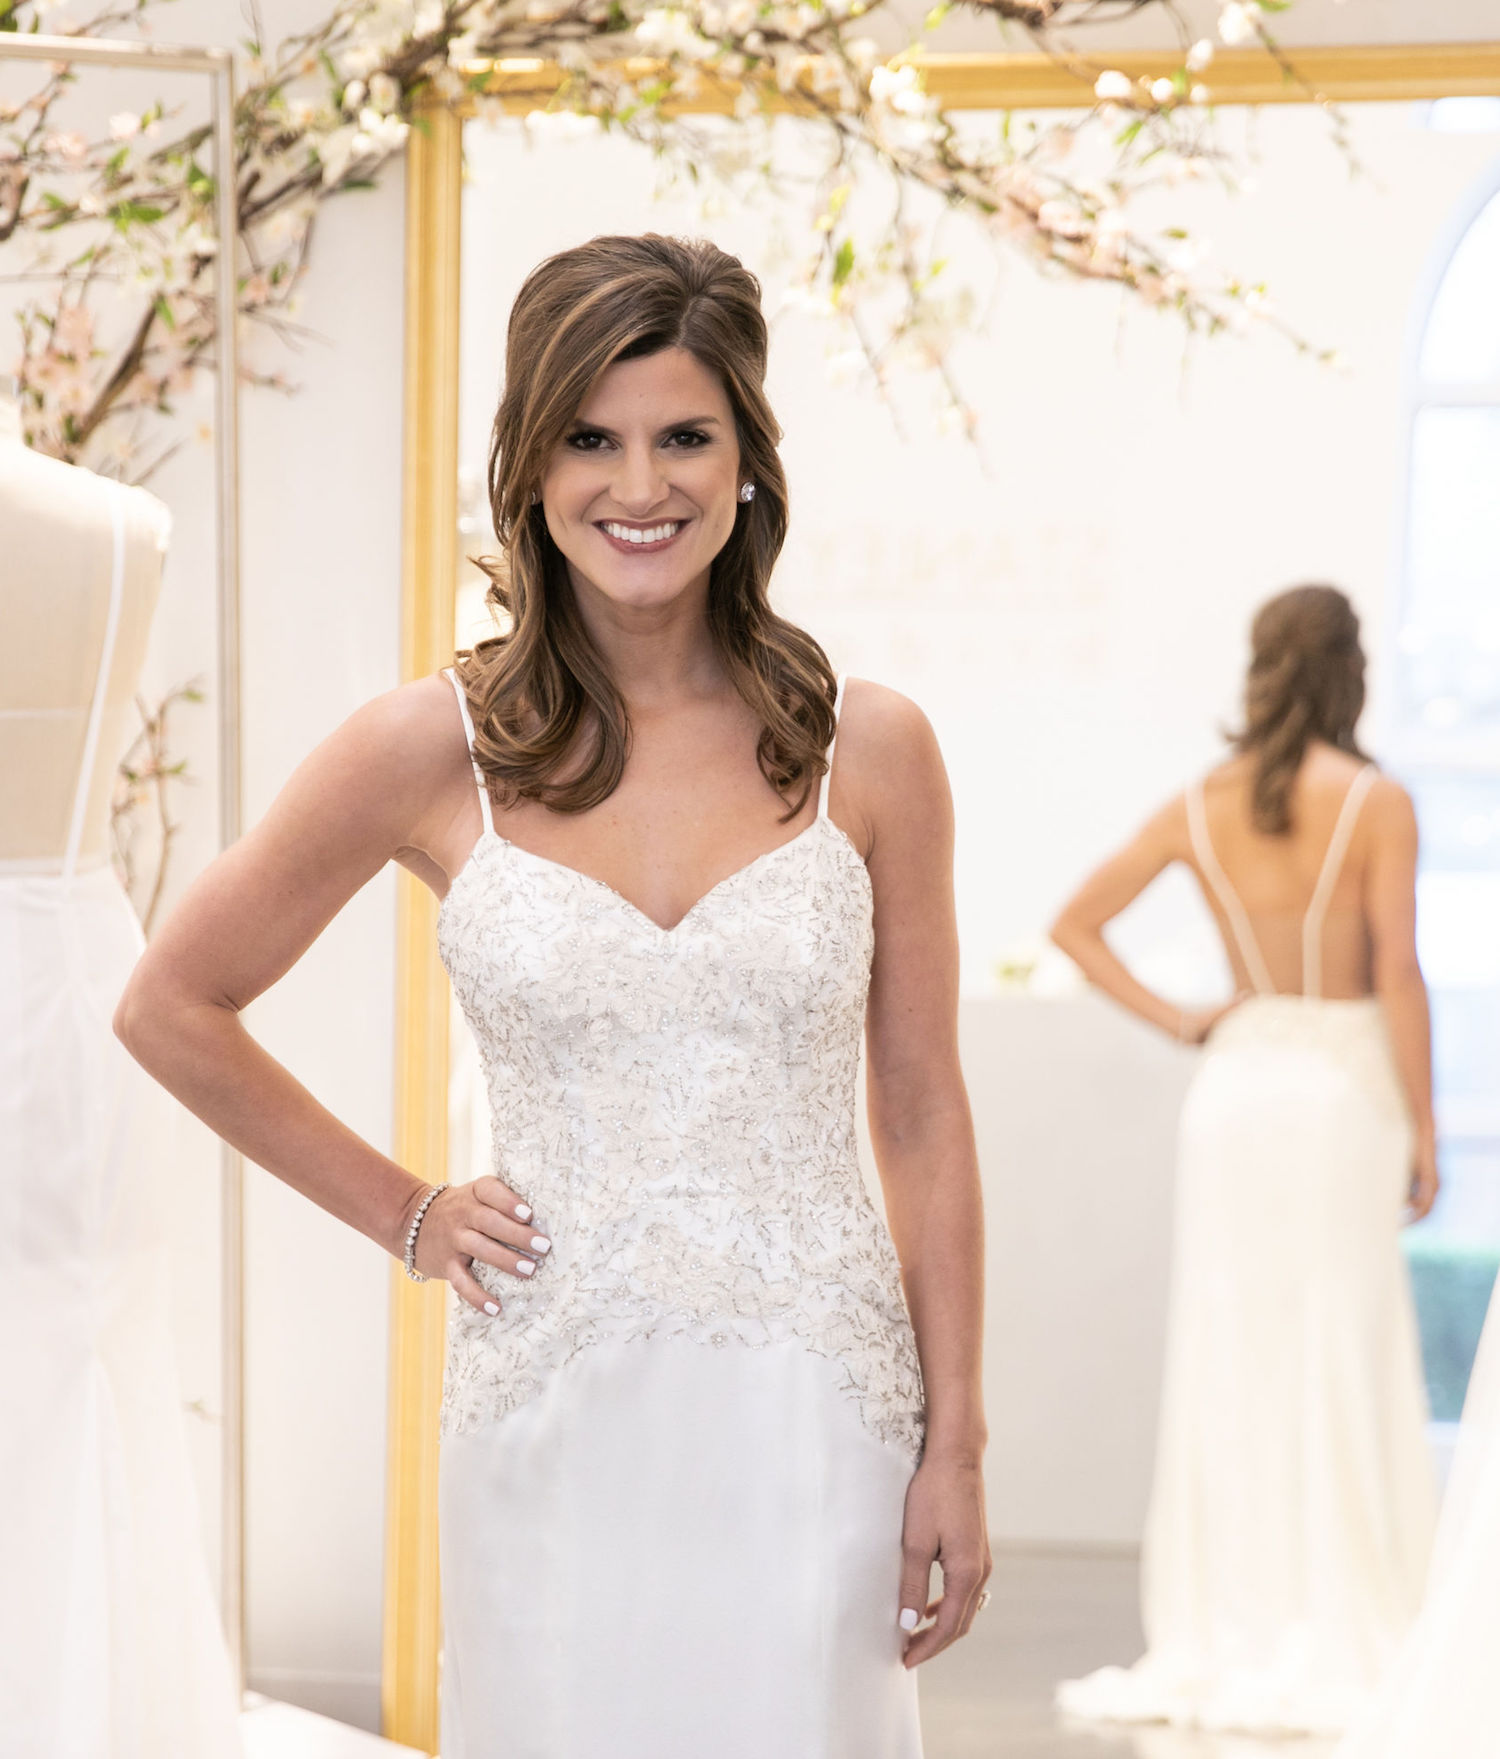
Hi friends! I’m so excited to be writing this post and sharing all the behind the scenes of creating a dress from scratch. It has been such an AMAZING experience and I’m so pleased with how the dress turned out.
Since my ceremony dress is princess style, I knew I wanted to something a little more fitted and that would be easier to move around (and dance!) in. I worked with designer Mackenzie Brittingham to design and create this dress and I just have to say that she was truly such a delight to work with!
Picking the Fit & Material
Since I ended up going with a (mostly) tulle dress for the ceremony, I knew I wanted to do something with lace for the reception. And like I mentioned above, I also knew I wanted to do something more form-fitting and that would be easier to move around in. We started by looking at all kinds of lace materials and dreaming up different silhouettes.
Here’s a photo above of us layering the different laces over a white material to see what they’d look like.
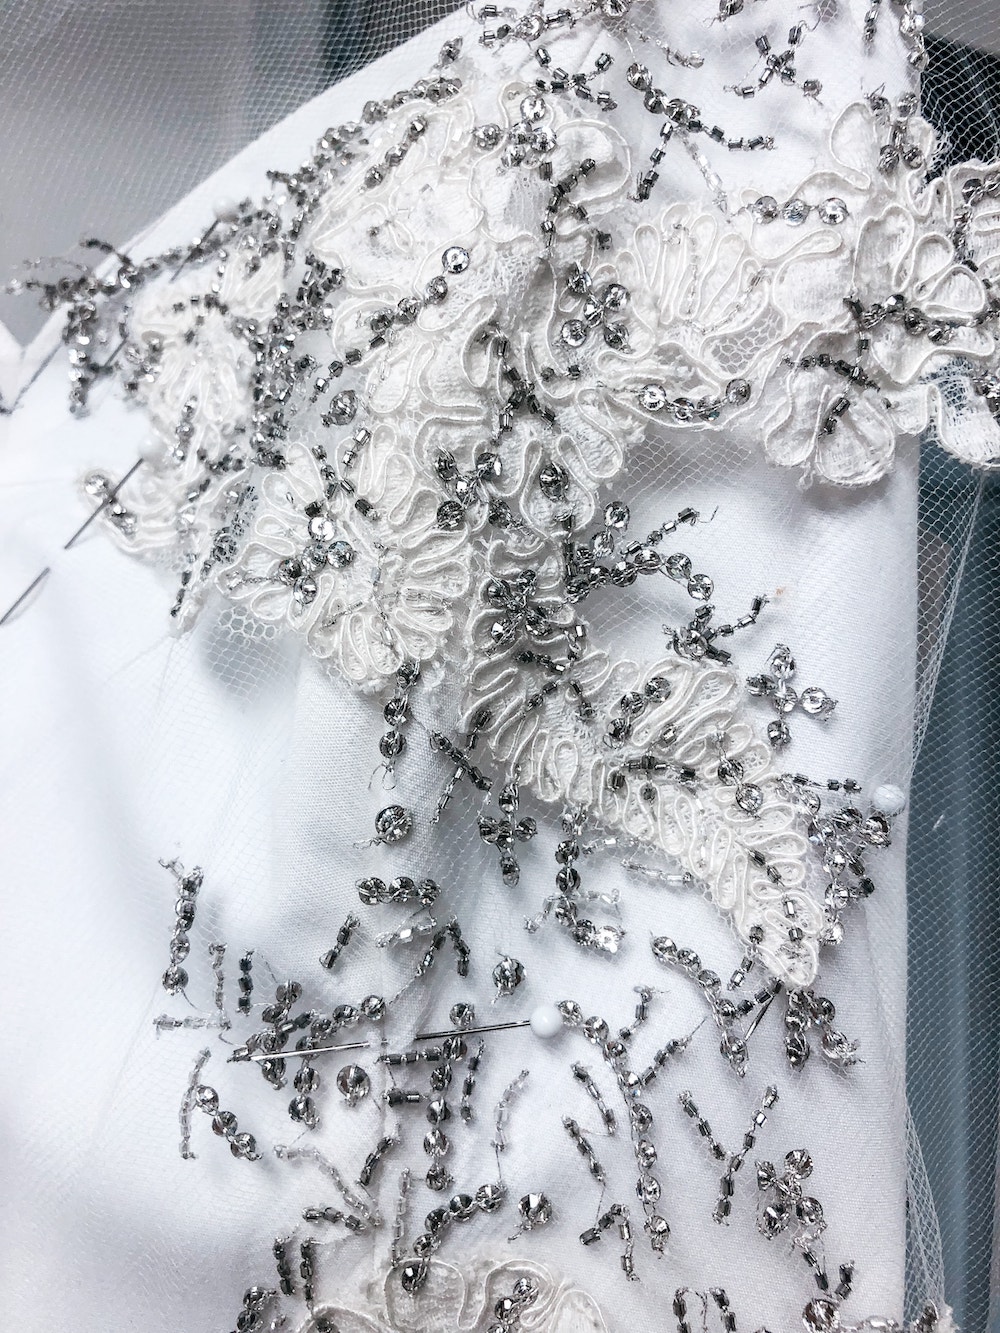
After looking through several different lace materials, I knew I wanted to do something that had some sparkle to it. This one (above) was my favorite because I loved that it had the classic Alencon lace blended together with the pretty Swarvoski crystals.
Selecting the Neckline Direction
When trying on dresses, I tended to lean towards necklines that showed off my collar bones – something about that just felt super feminine and elegant to me.
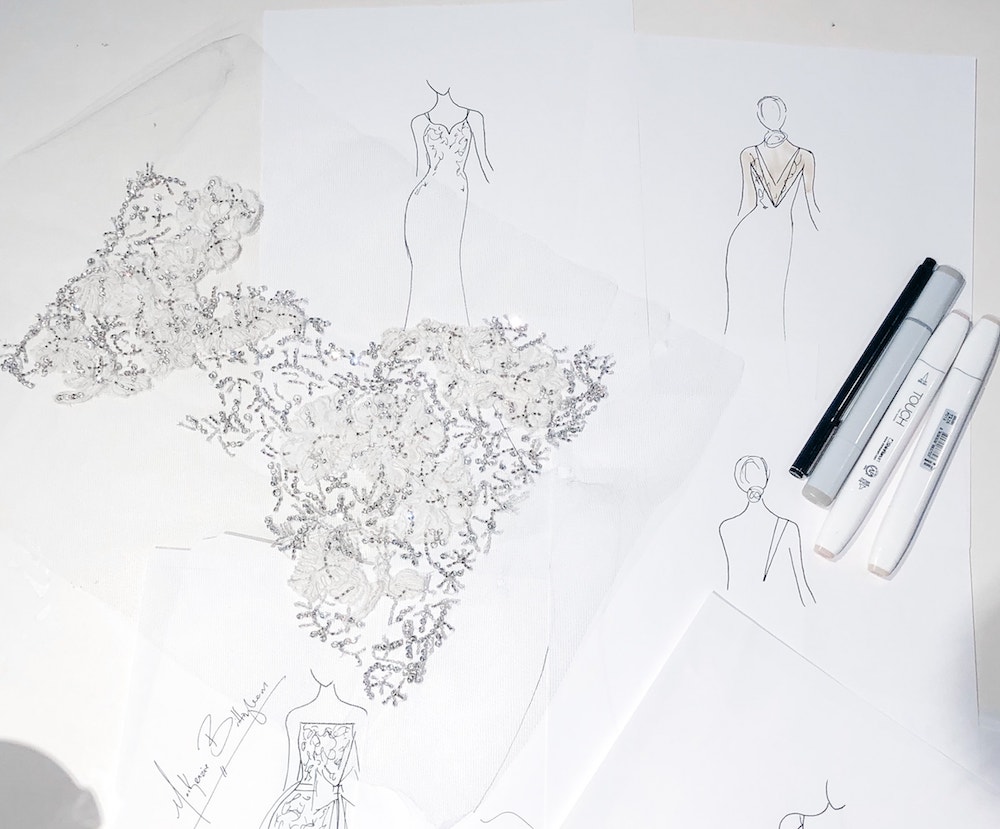
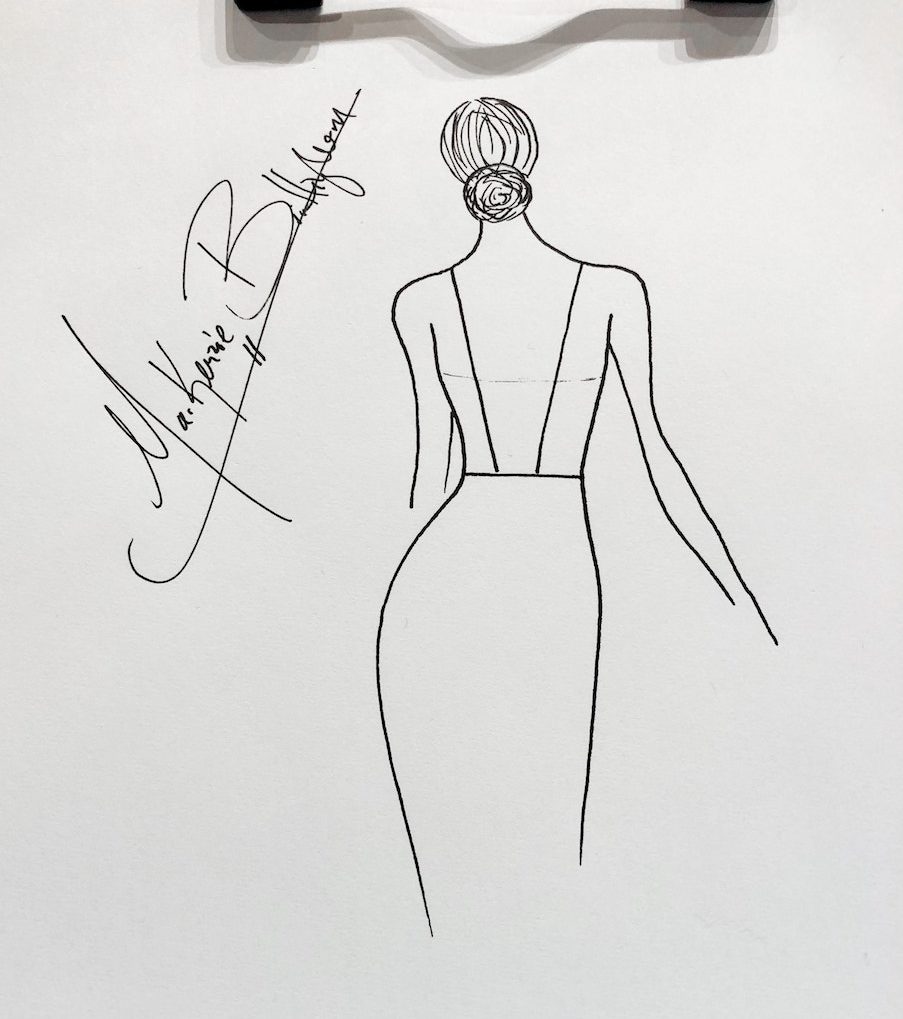
I loved sweetheart and strapless and some of the more modern versions of those too as well. We decided to do something like that with a mix – we did a modified sweetheart neckline with straps. Check out this design that Mackenzie had already created in a previous dress below.

We used this as a starting point and then started imagining and brainstorming what the back could look like, given this front neckline.
In the photo above, we took a few pieces of the lace I’d chosen and layered it over the dress we were trying on for the neckline. I liked how it looked! So now it was time to figure out the back.
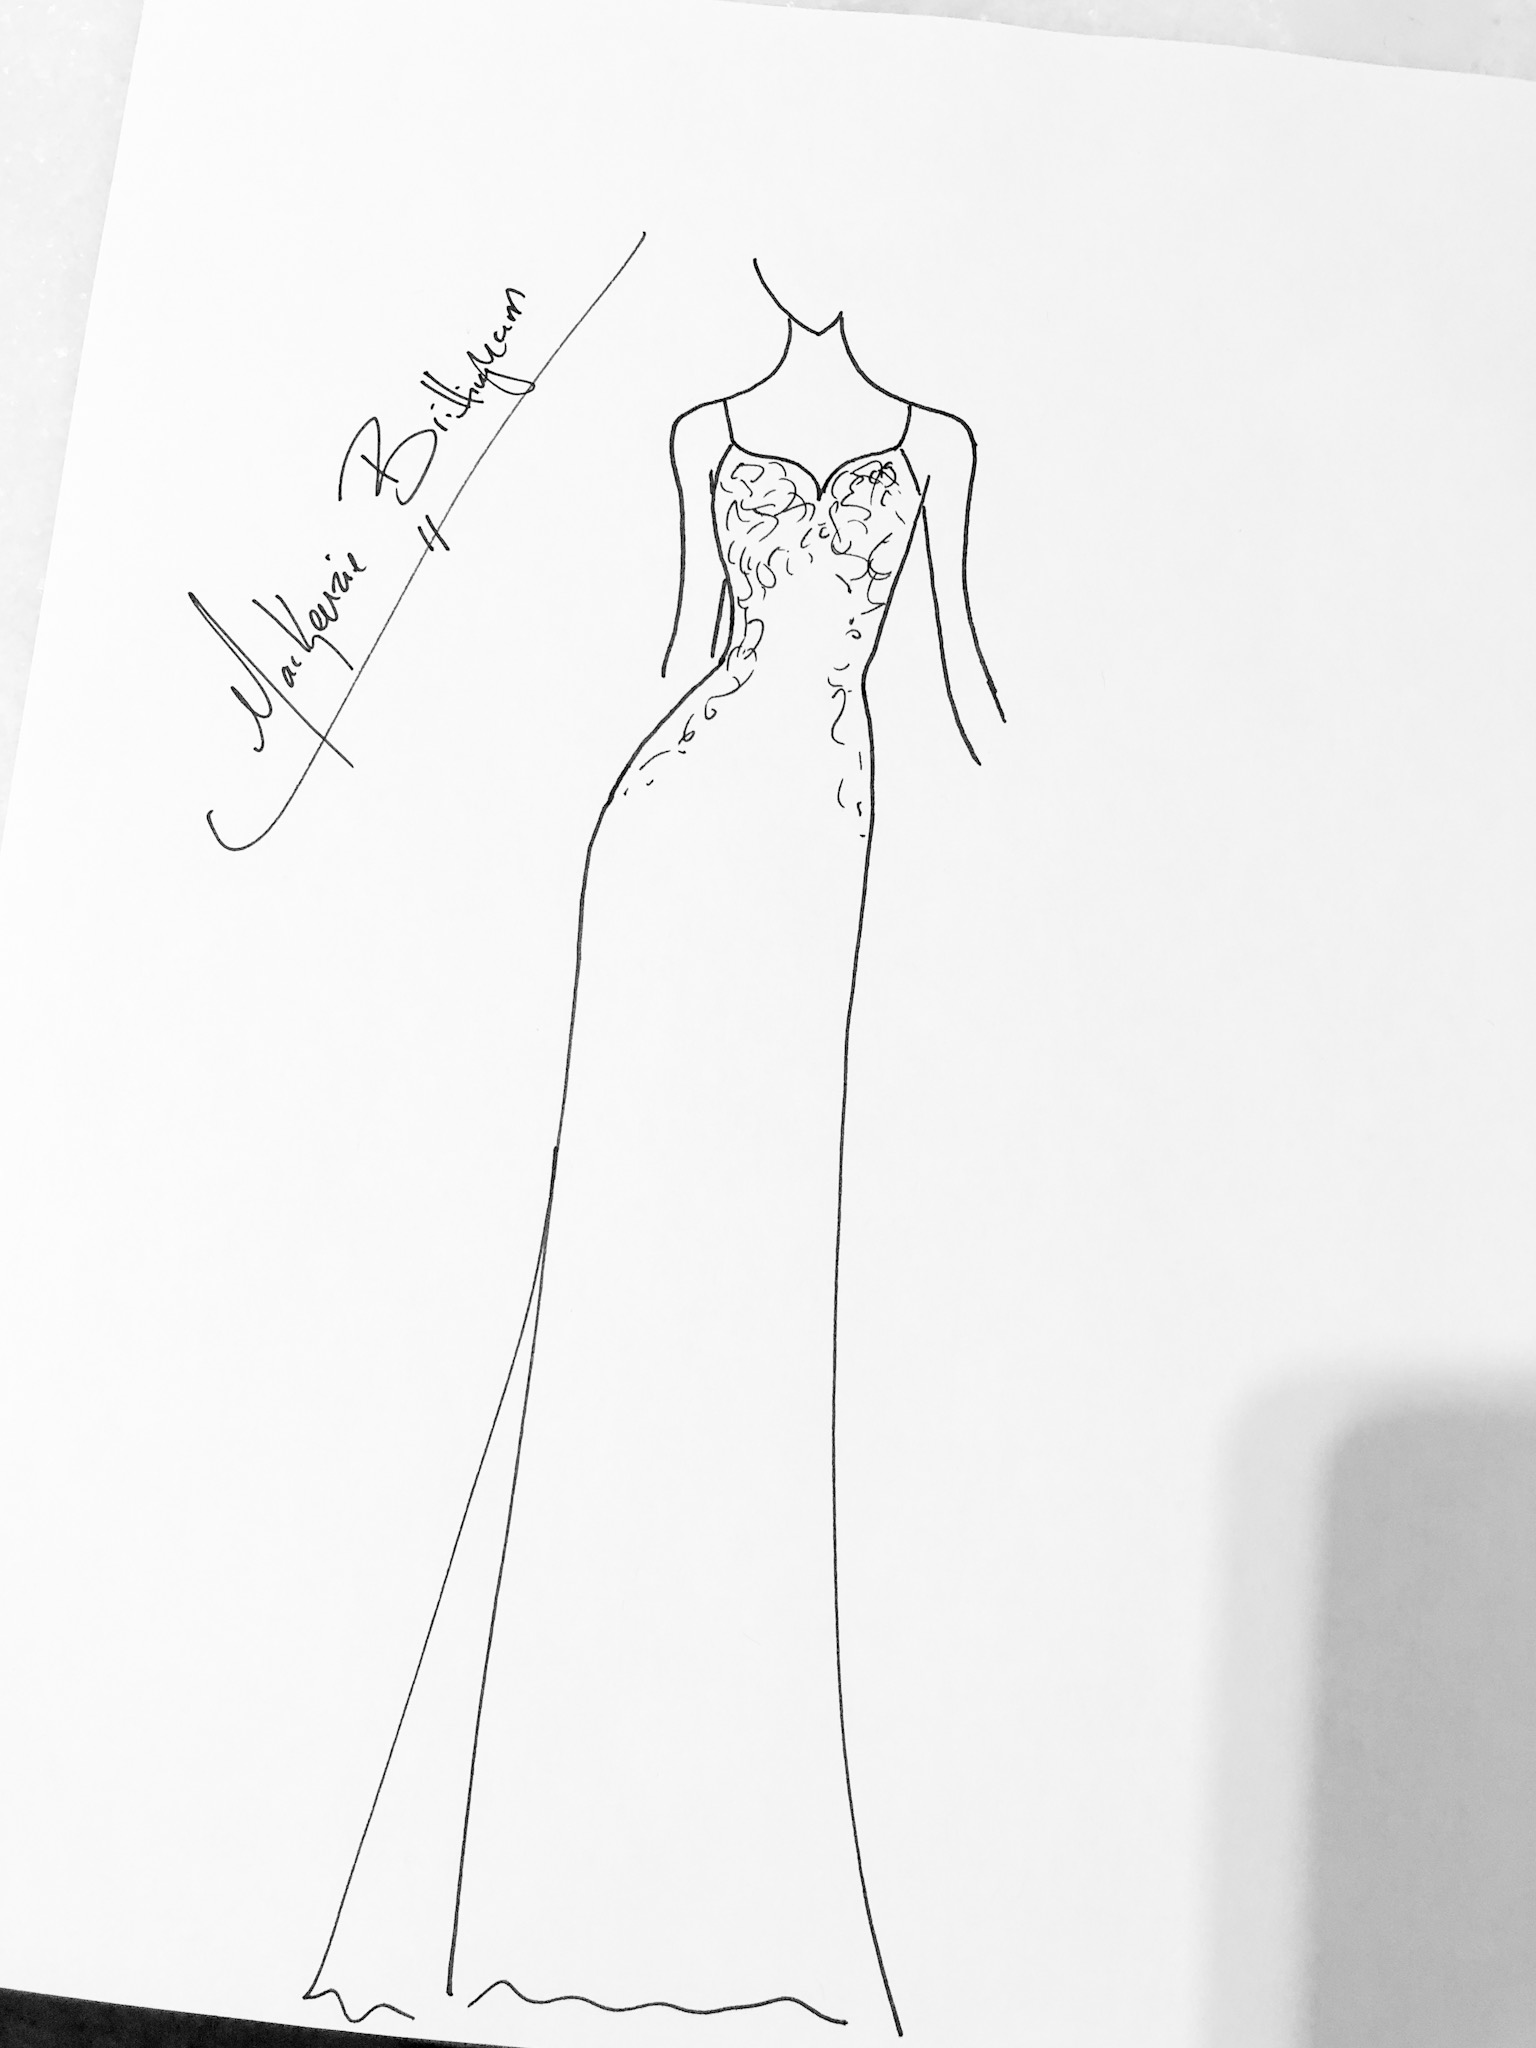
We did a sketch of the front and I loved how it was turning out (see above).
Designing The Back
The sample dress that I had tried on had two straps like this in the back (in the photo below). I liked it, but I wanted to try a few other options.
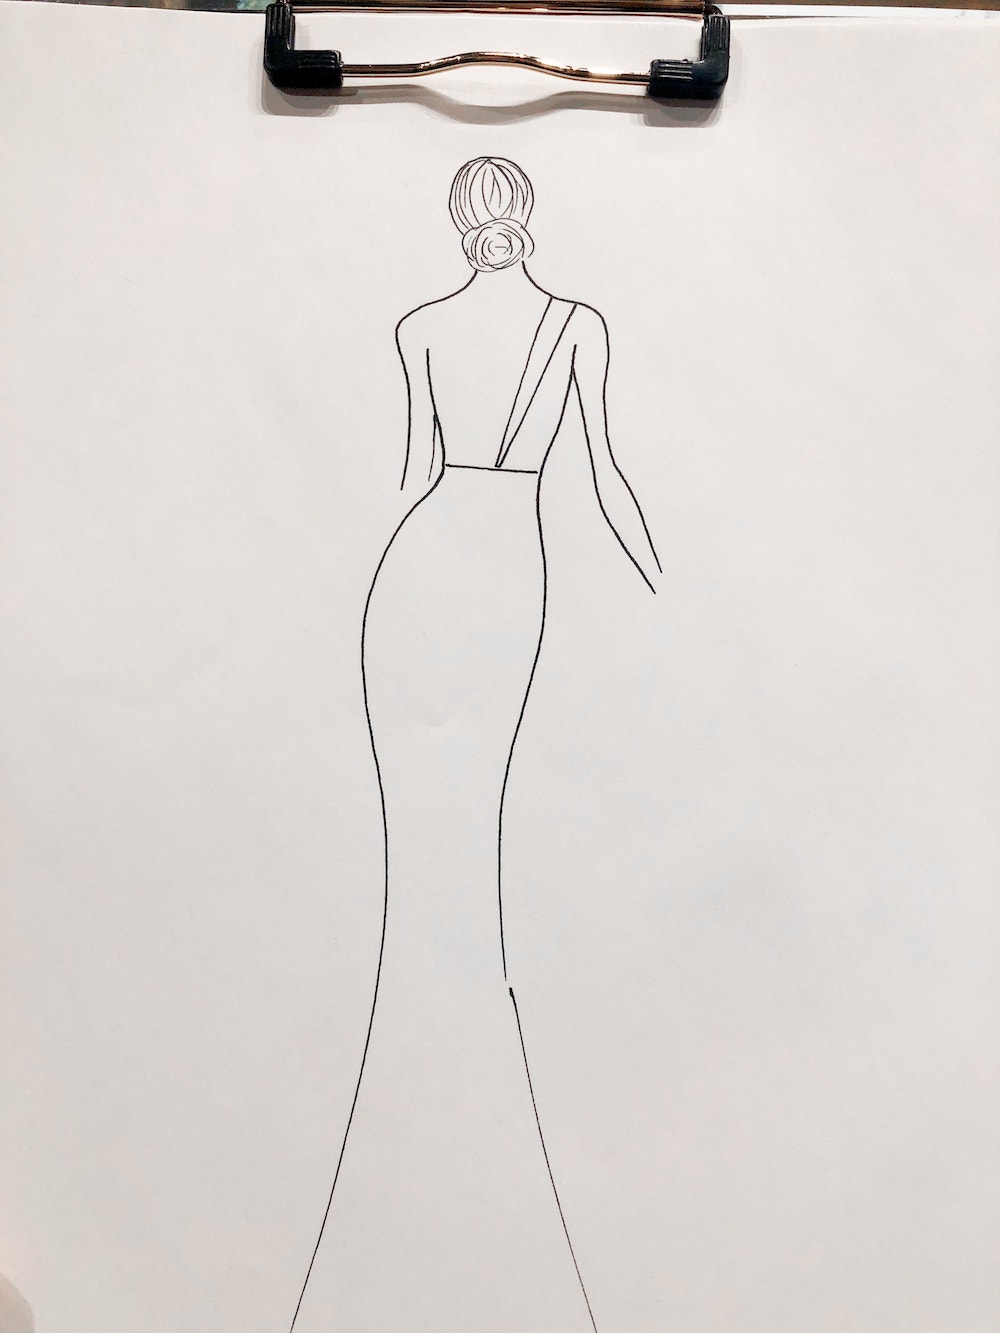
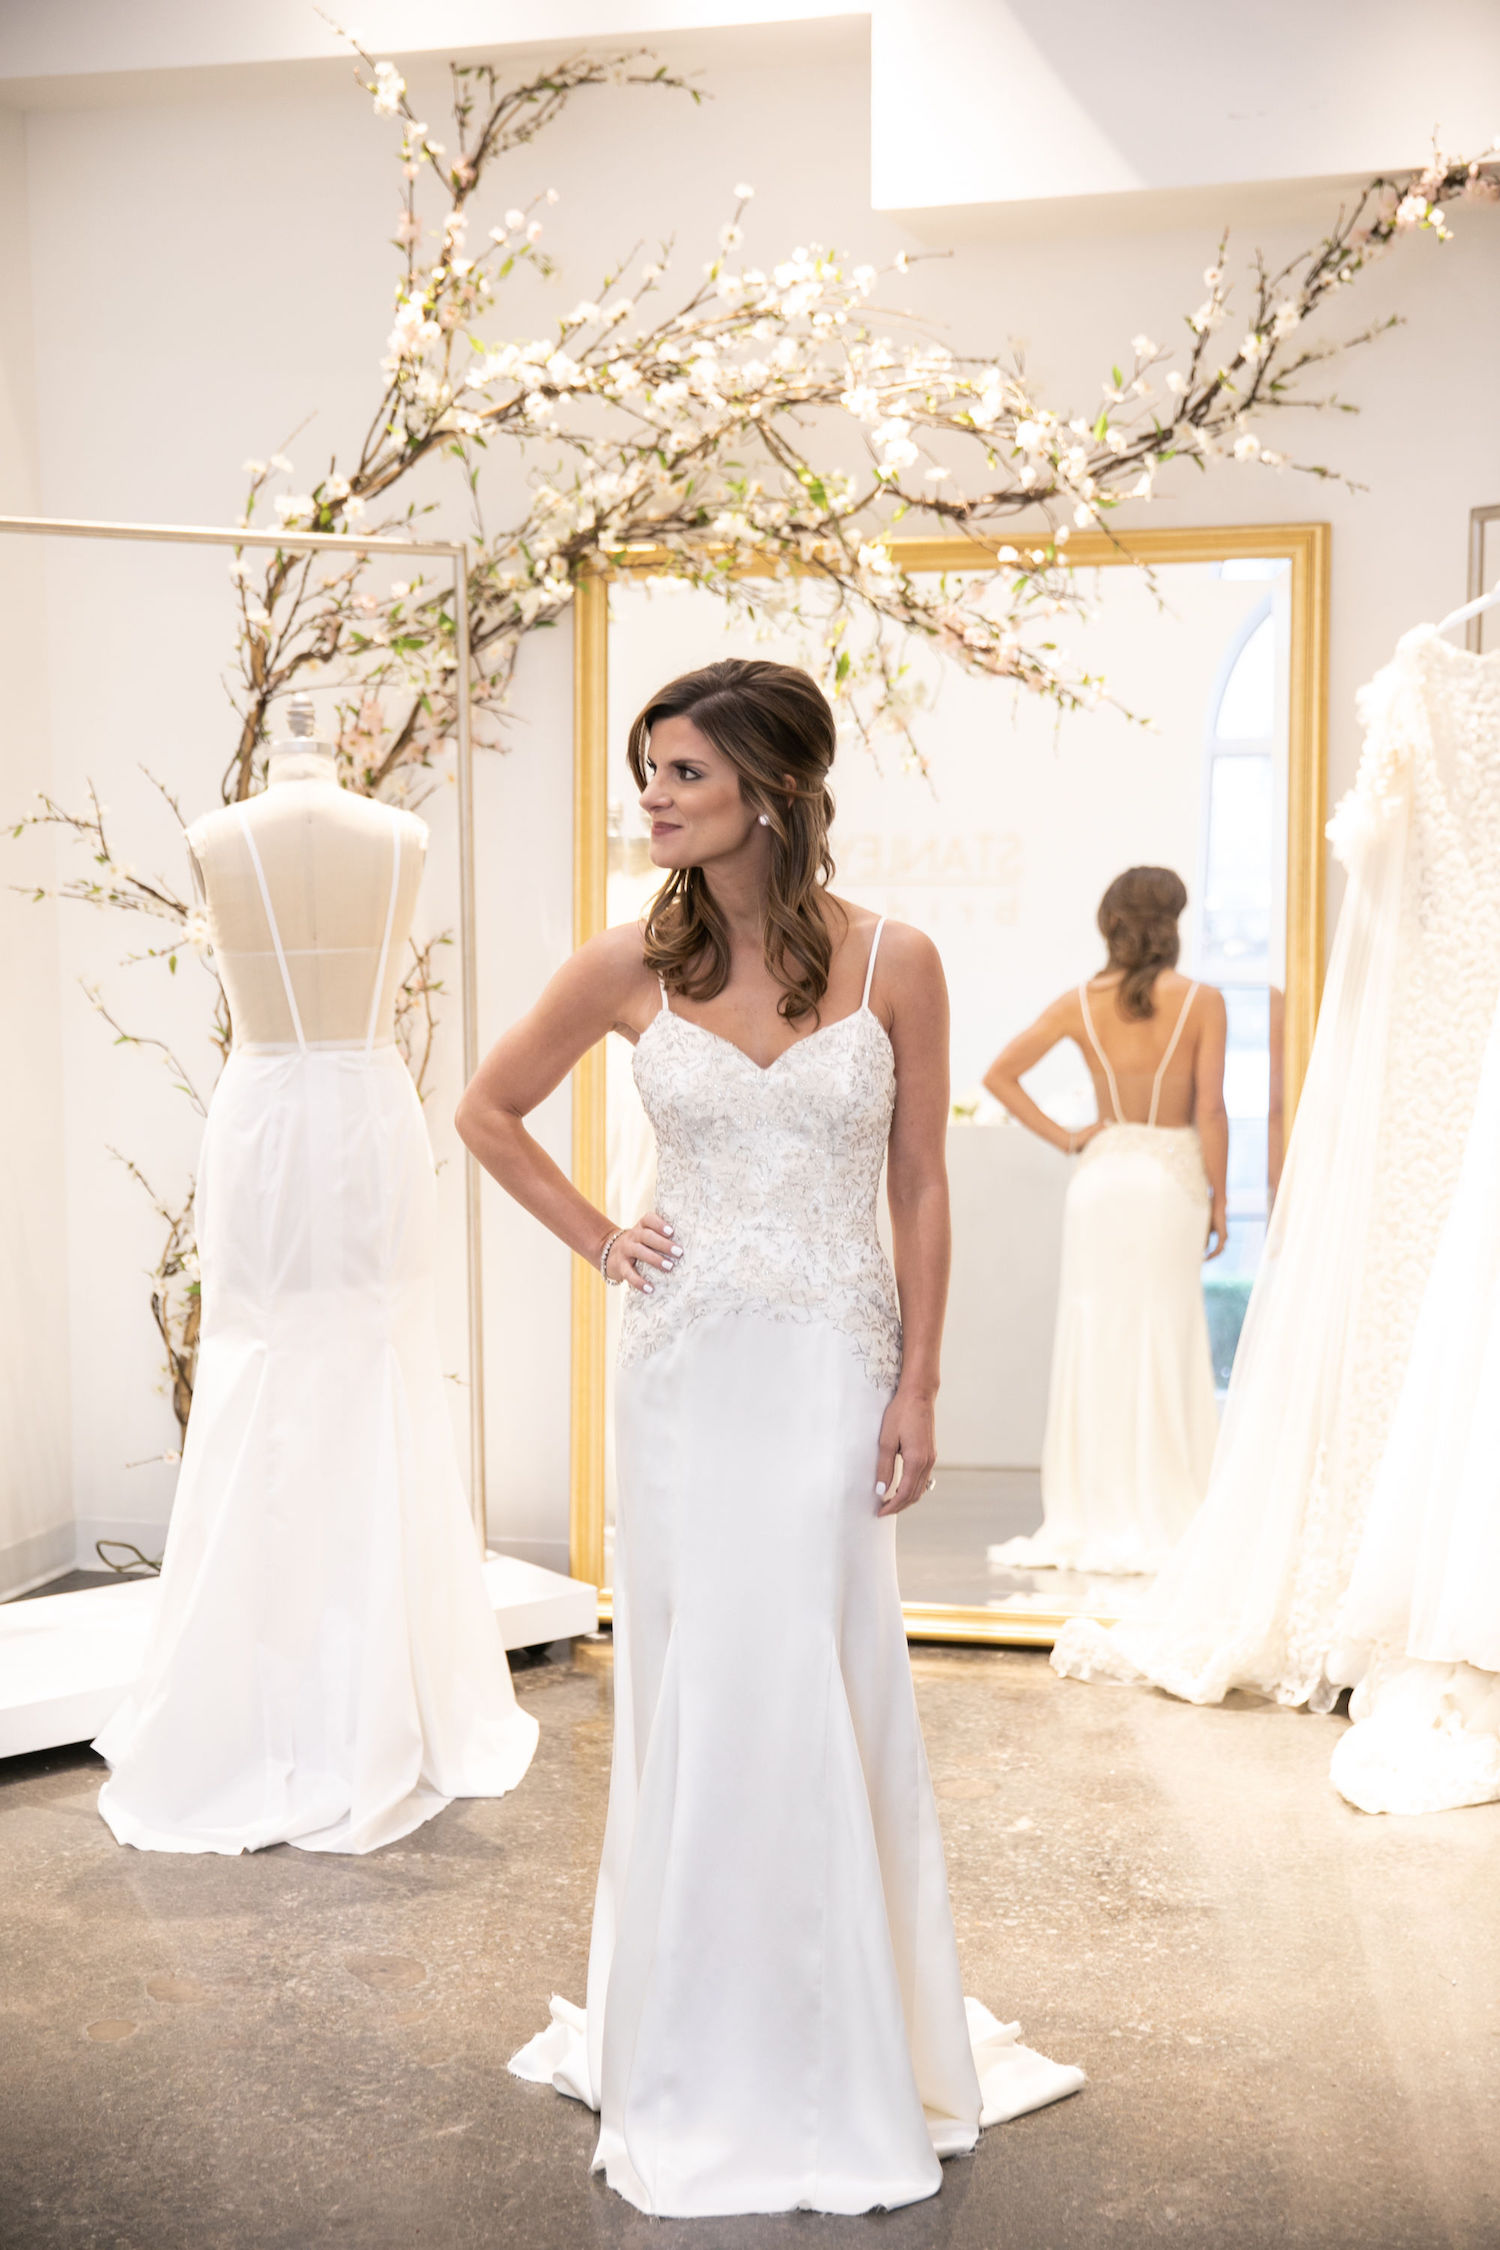
We decide to go with one strap for a more simplistic look (like the image below!). And my hope was to have a completely open back where all you saw were the simple two, skinny straps.
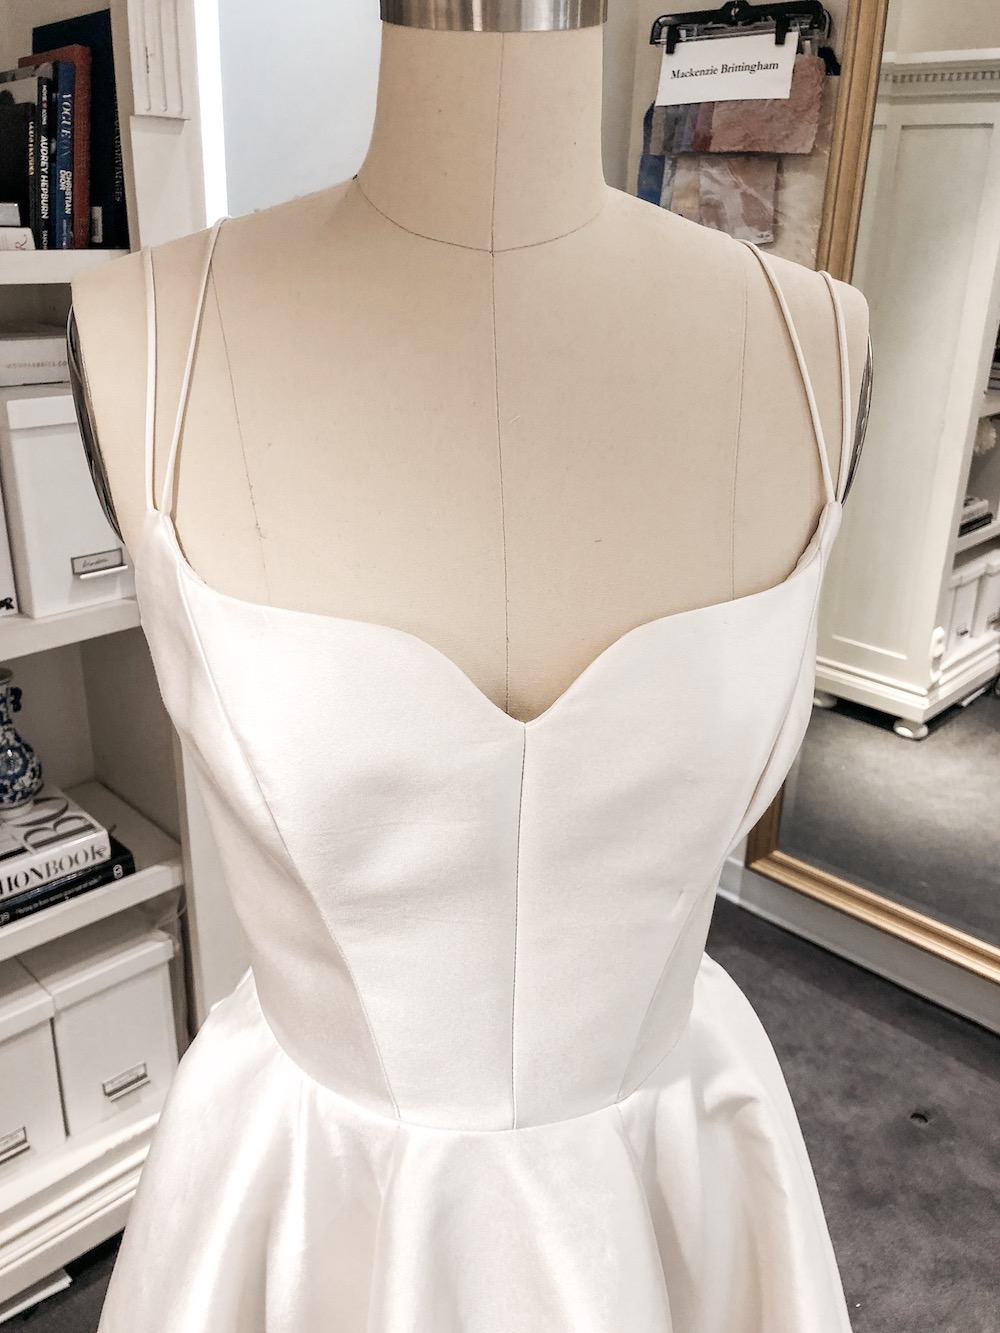
The Muslin Fitting
I’d never heard the term “muslin” before but basically it’s like the initial pattern of the dress they make using just simple white cotton fabric – to get an idea of the fit. Here is what mine looked like (below).
We pinned some lace on it just so we could see what it would look like.
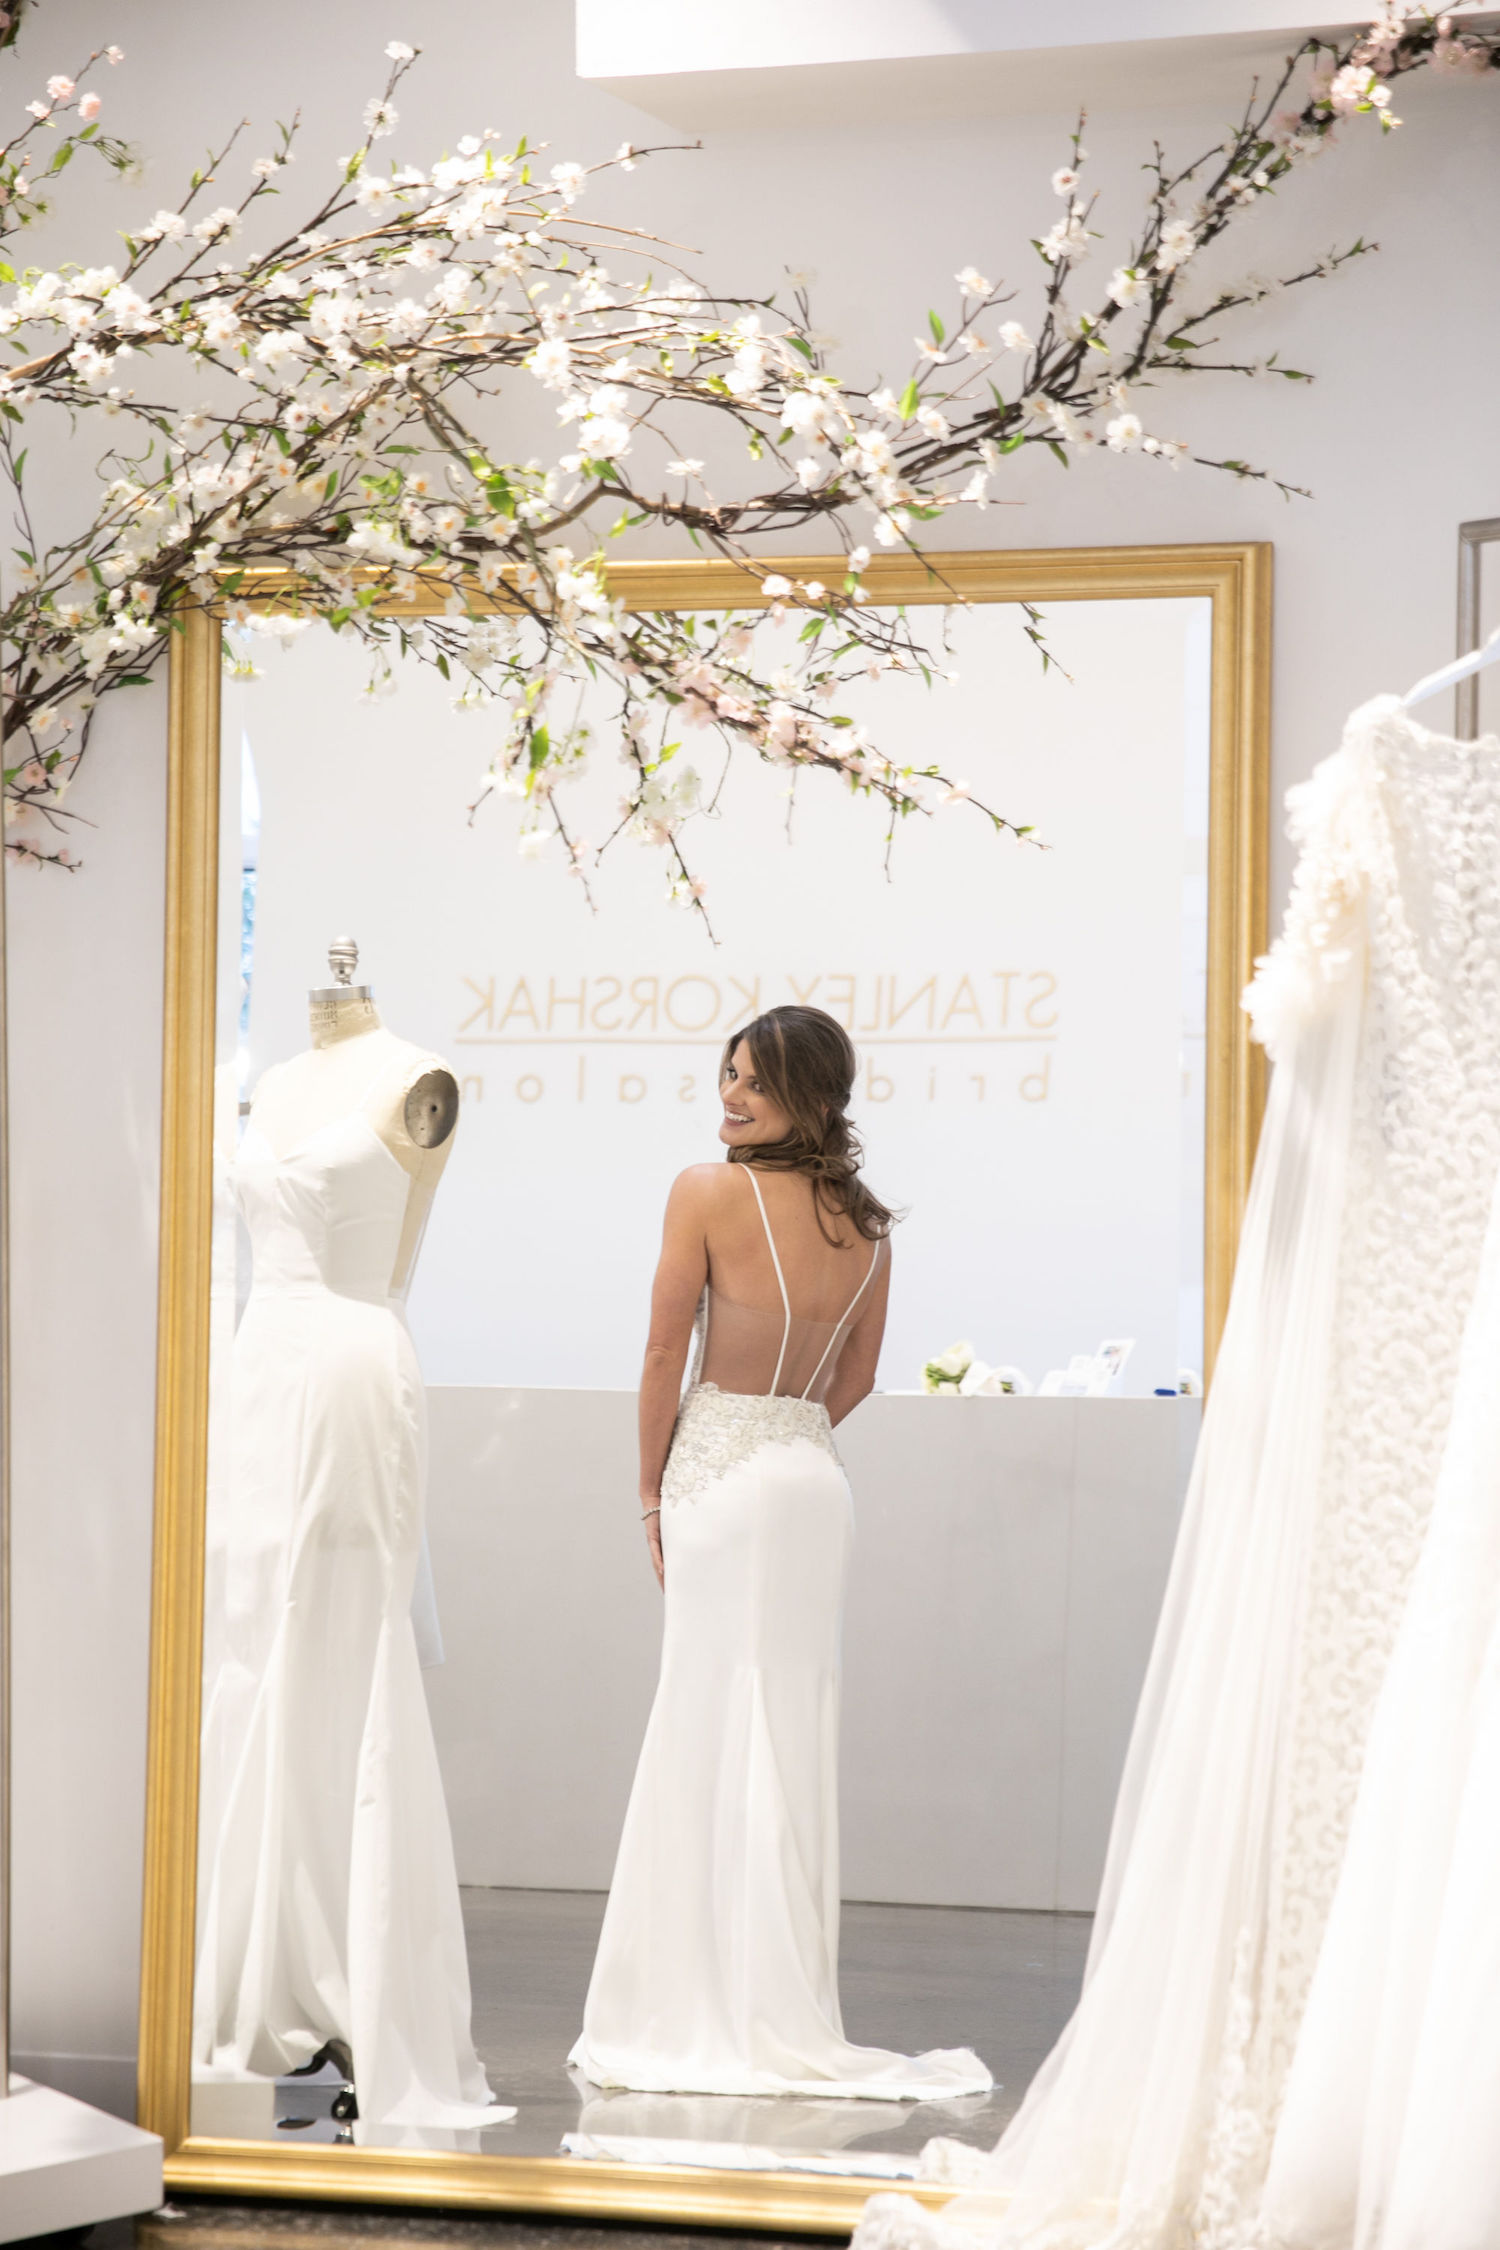
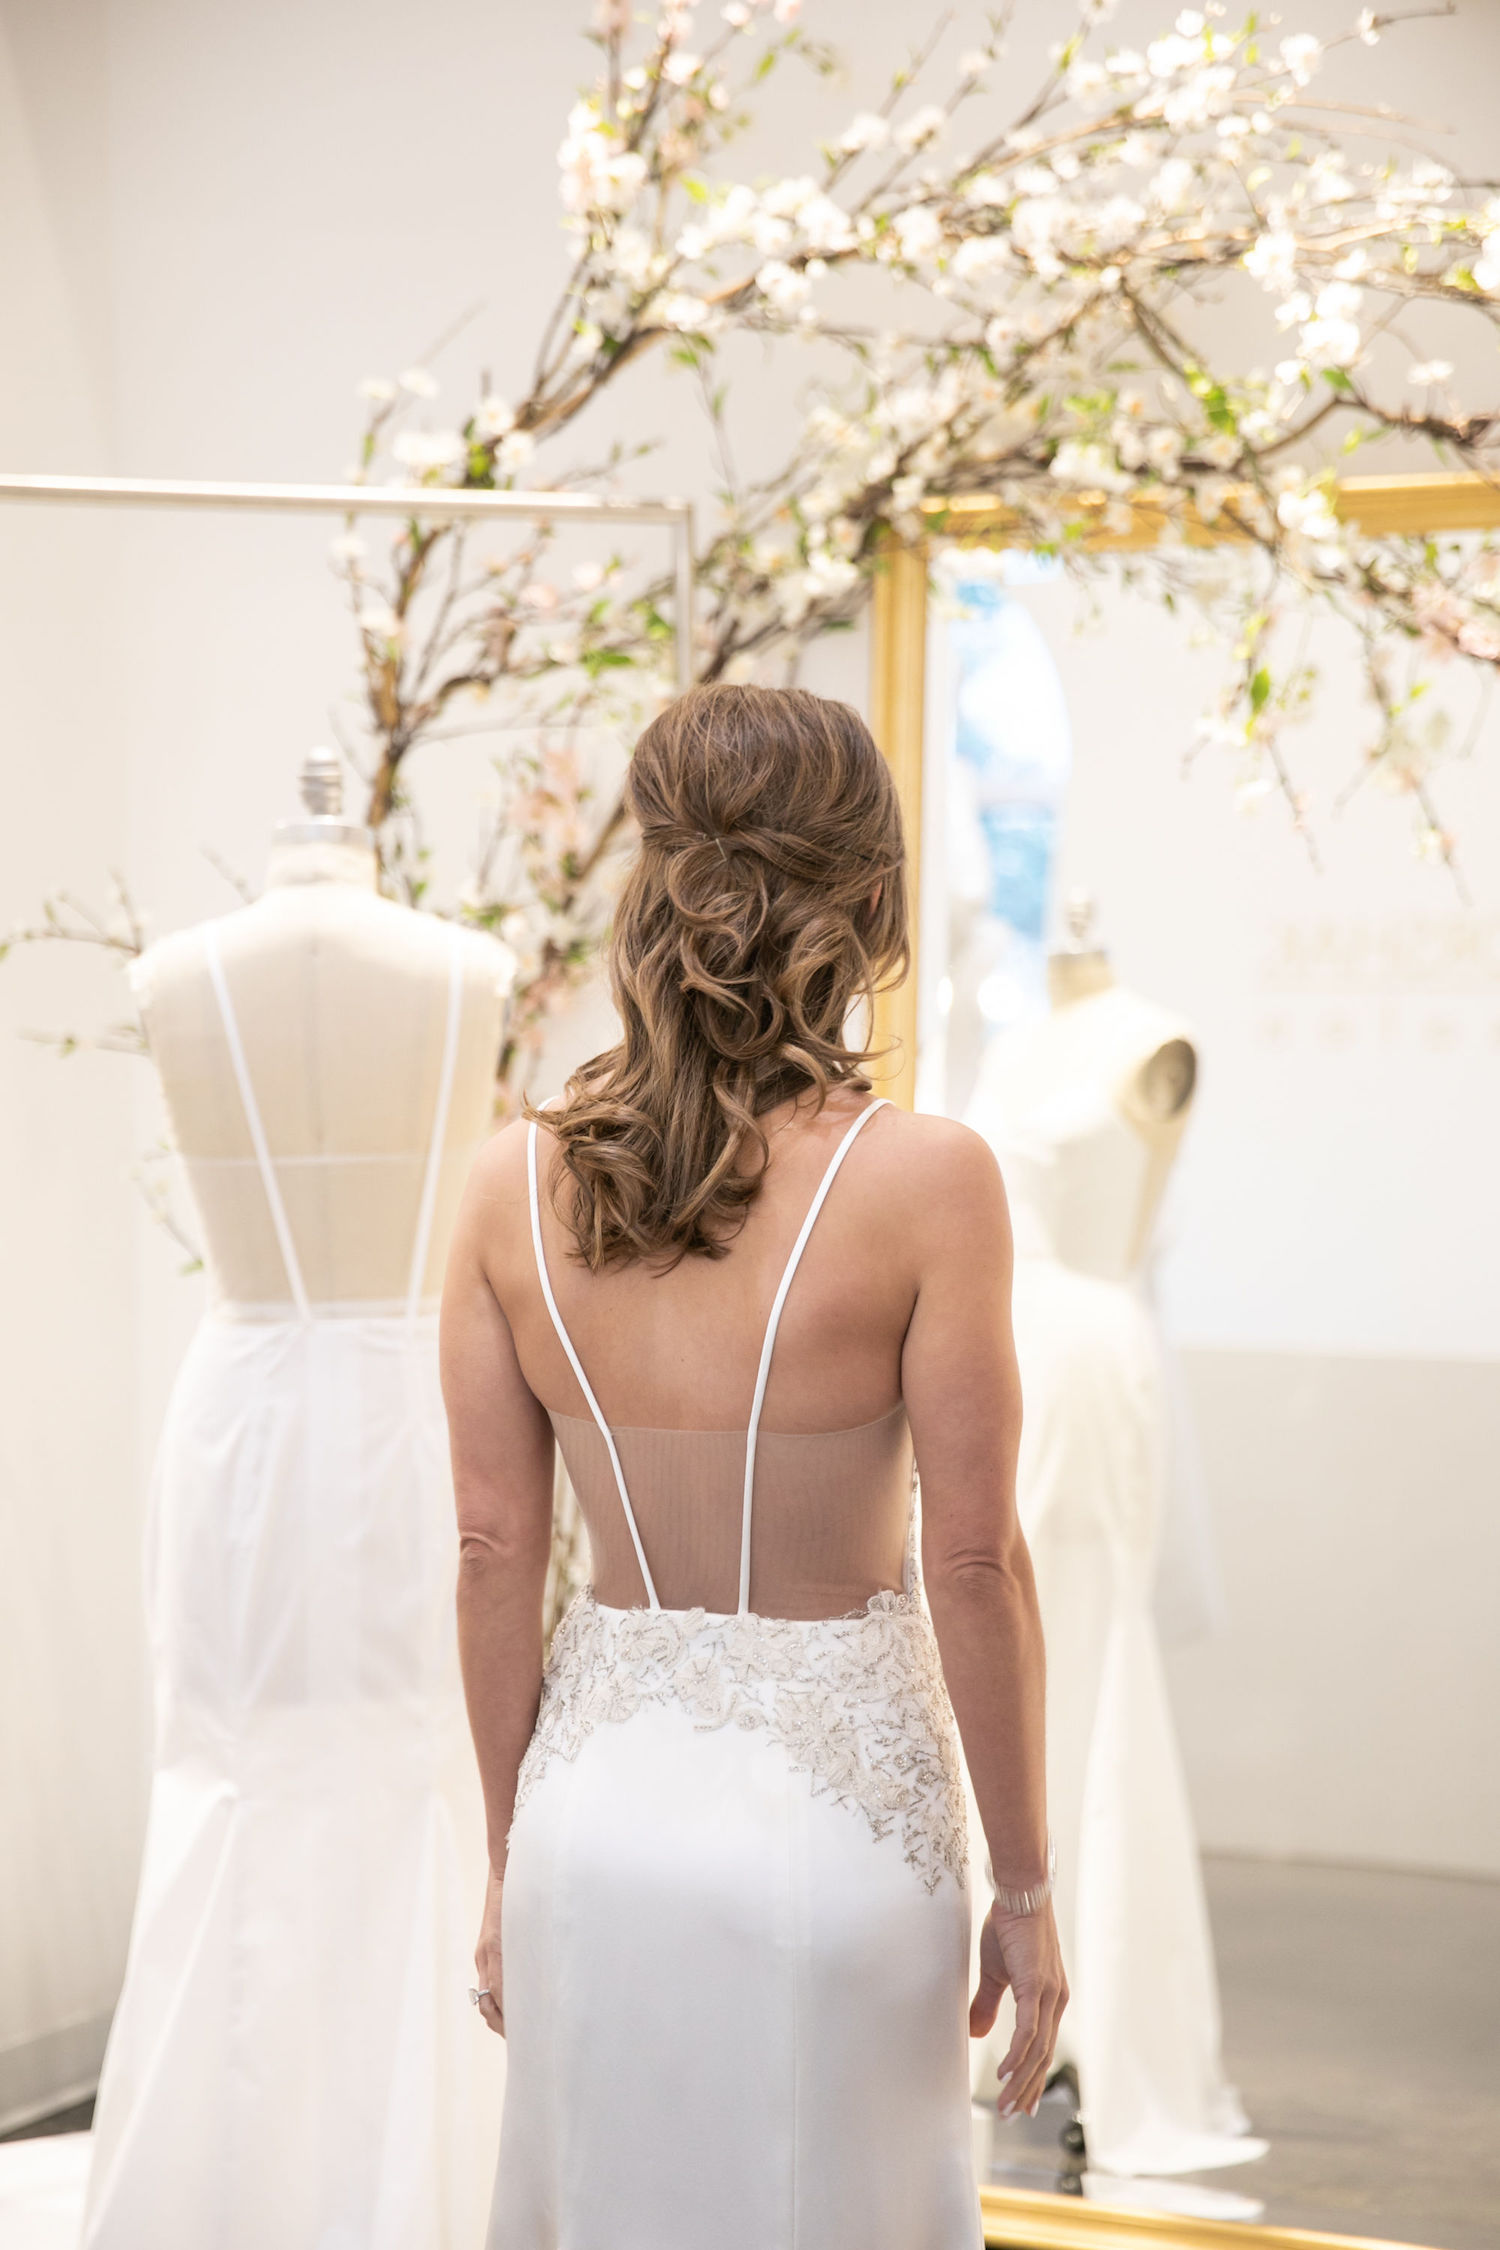
It was a little hard for me to imagine, but I knew I loved how the dress was fitting and the back was my FAVORITE part!! I LOVED how it turned out!
I loved how the back was simple with straight edges and completely open – if that makes sense?
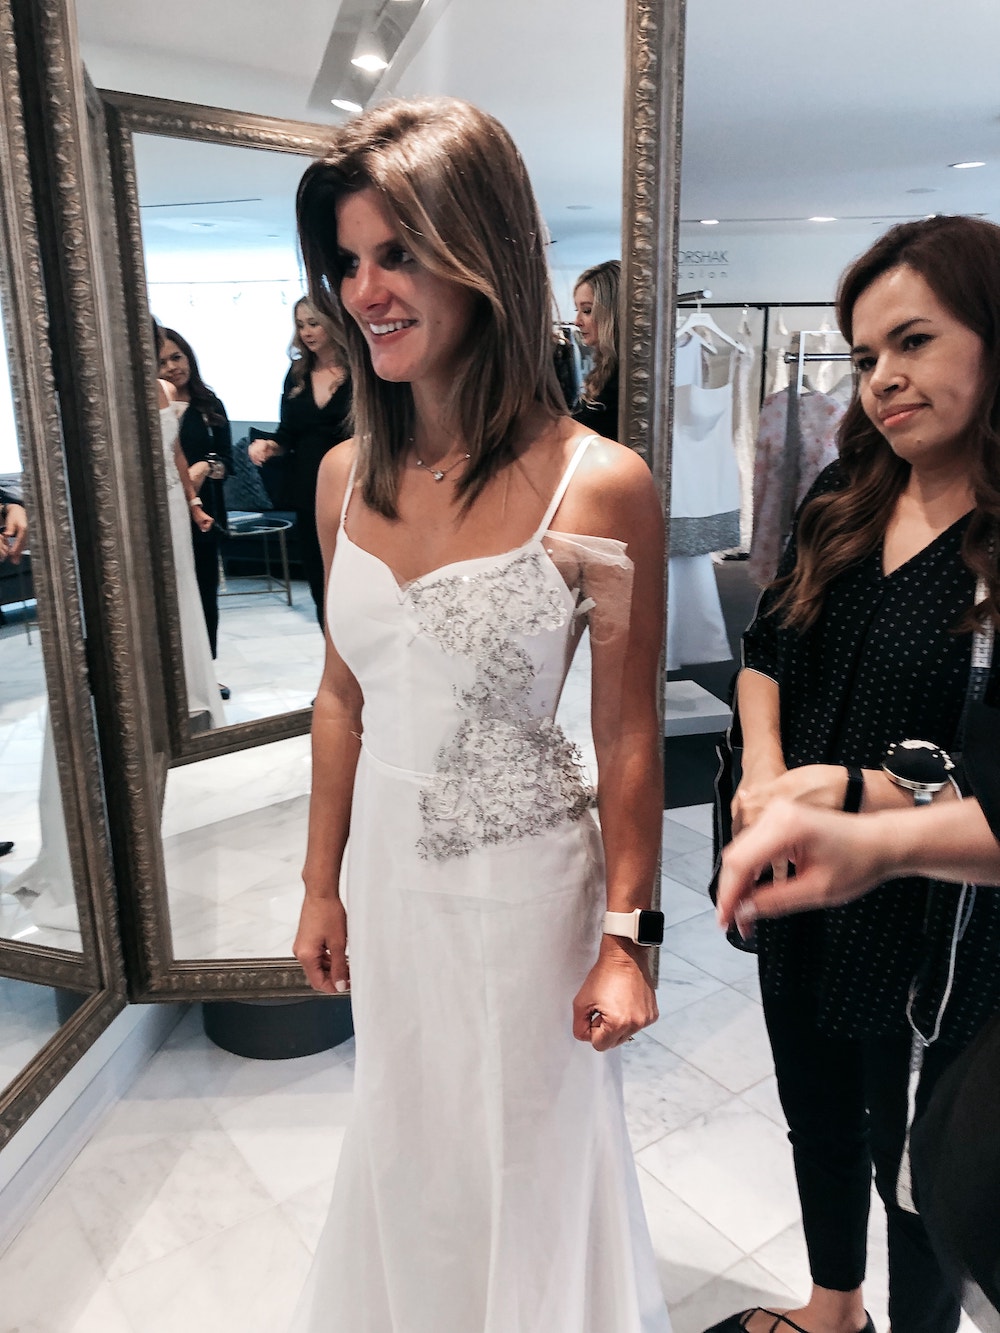
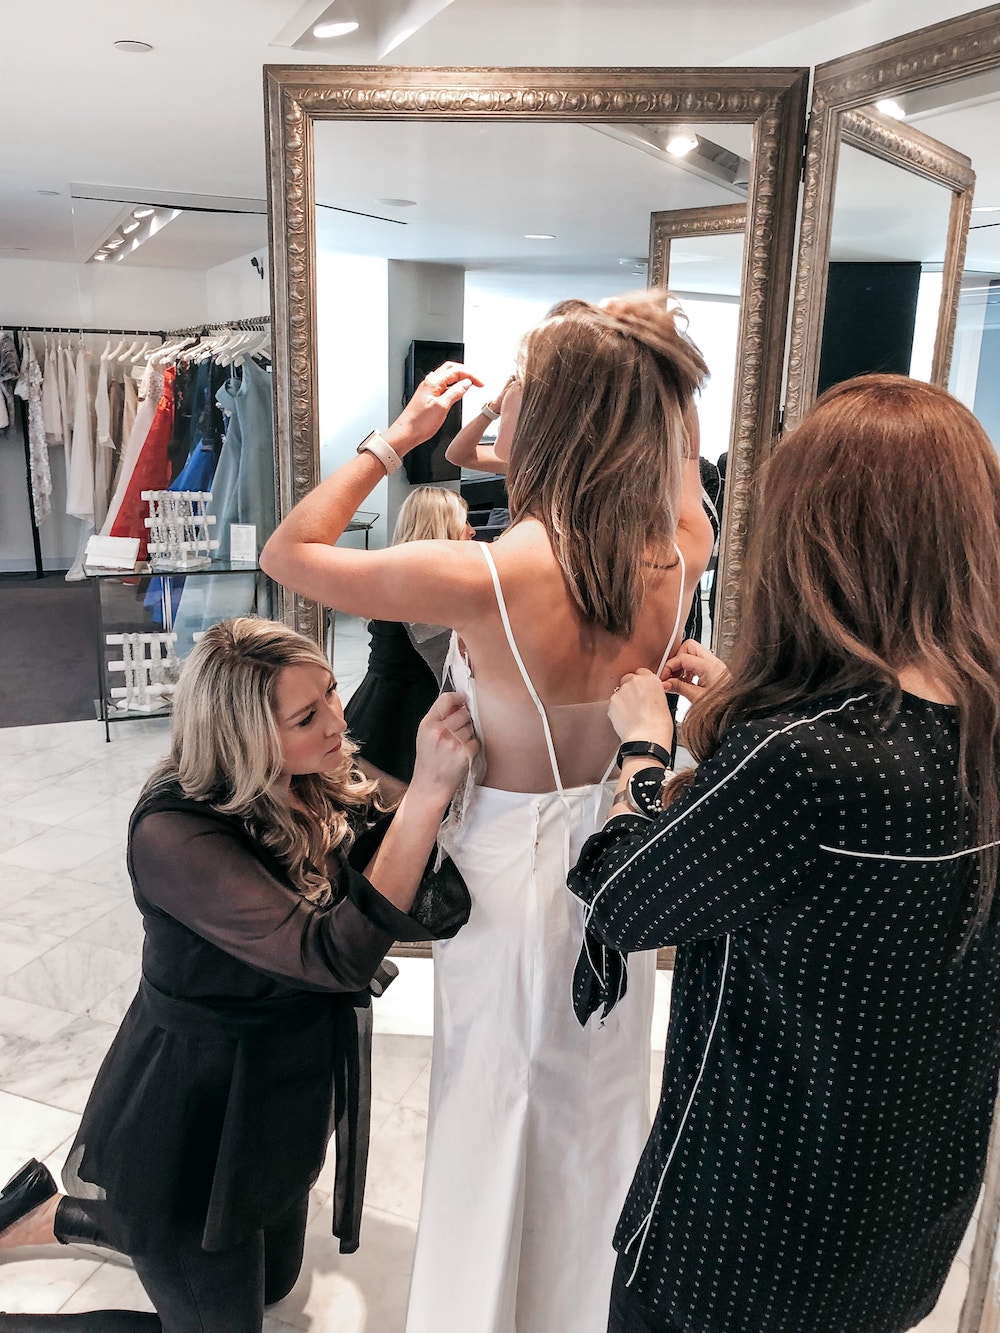
The First Fitting
They took the muslin dress and used that pattern to make the first version of the real dress! It was so cool to see this process and see it all coming together.
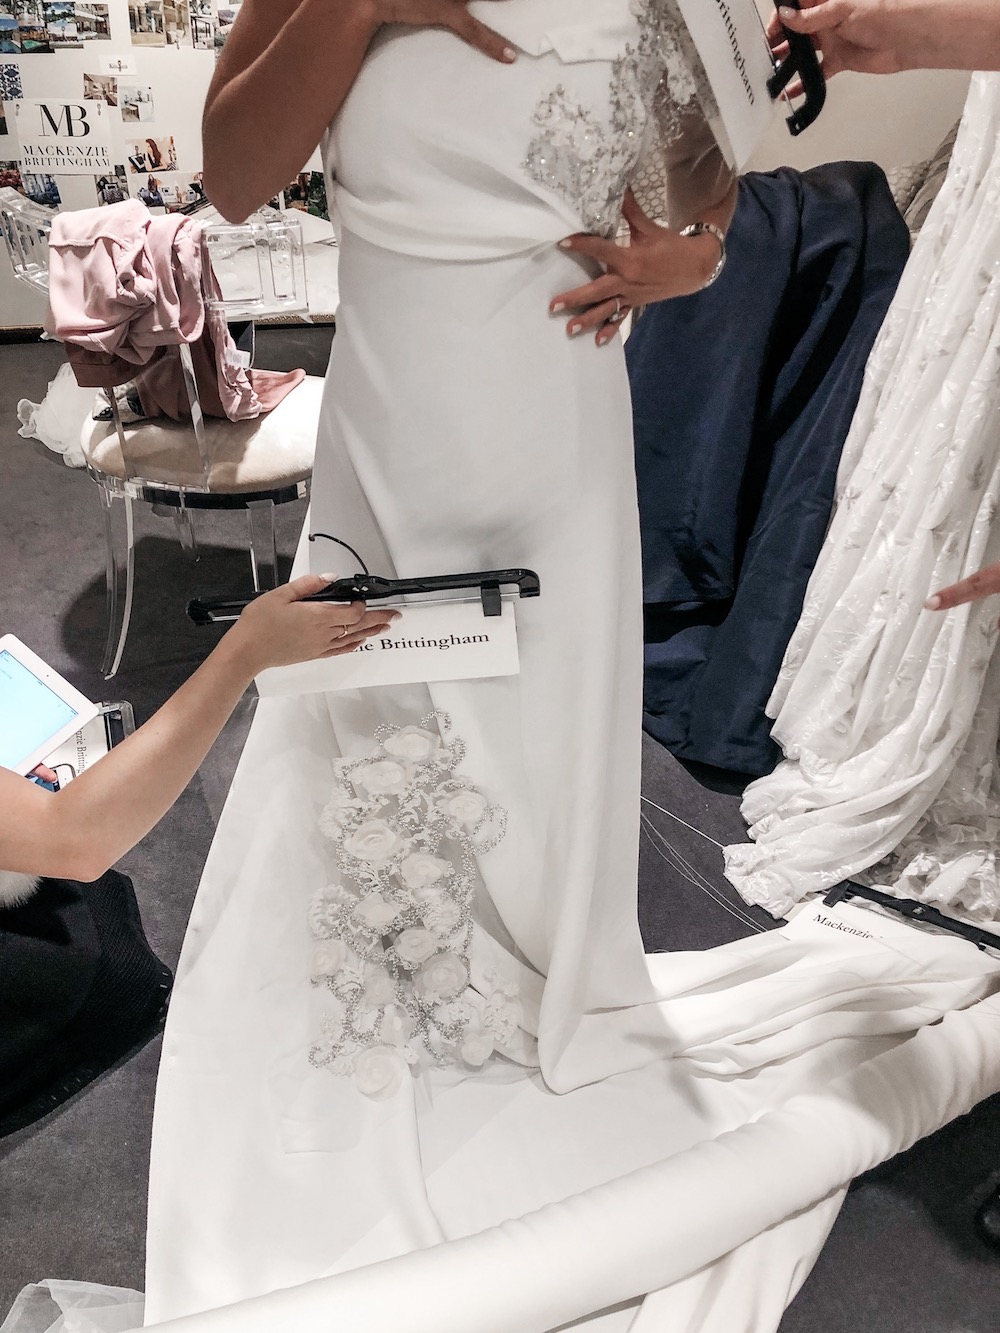
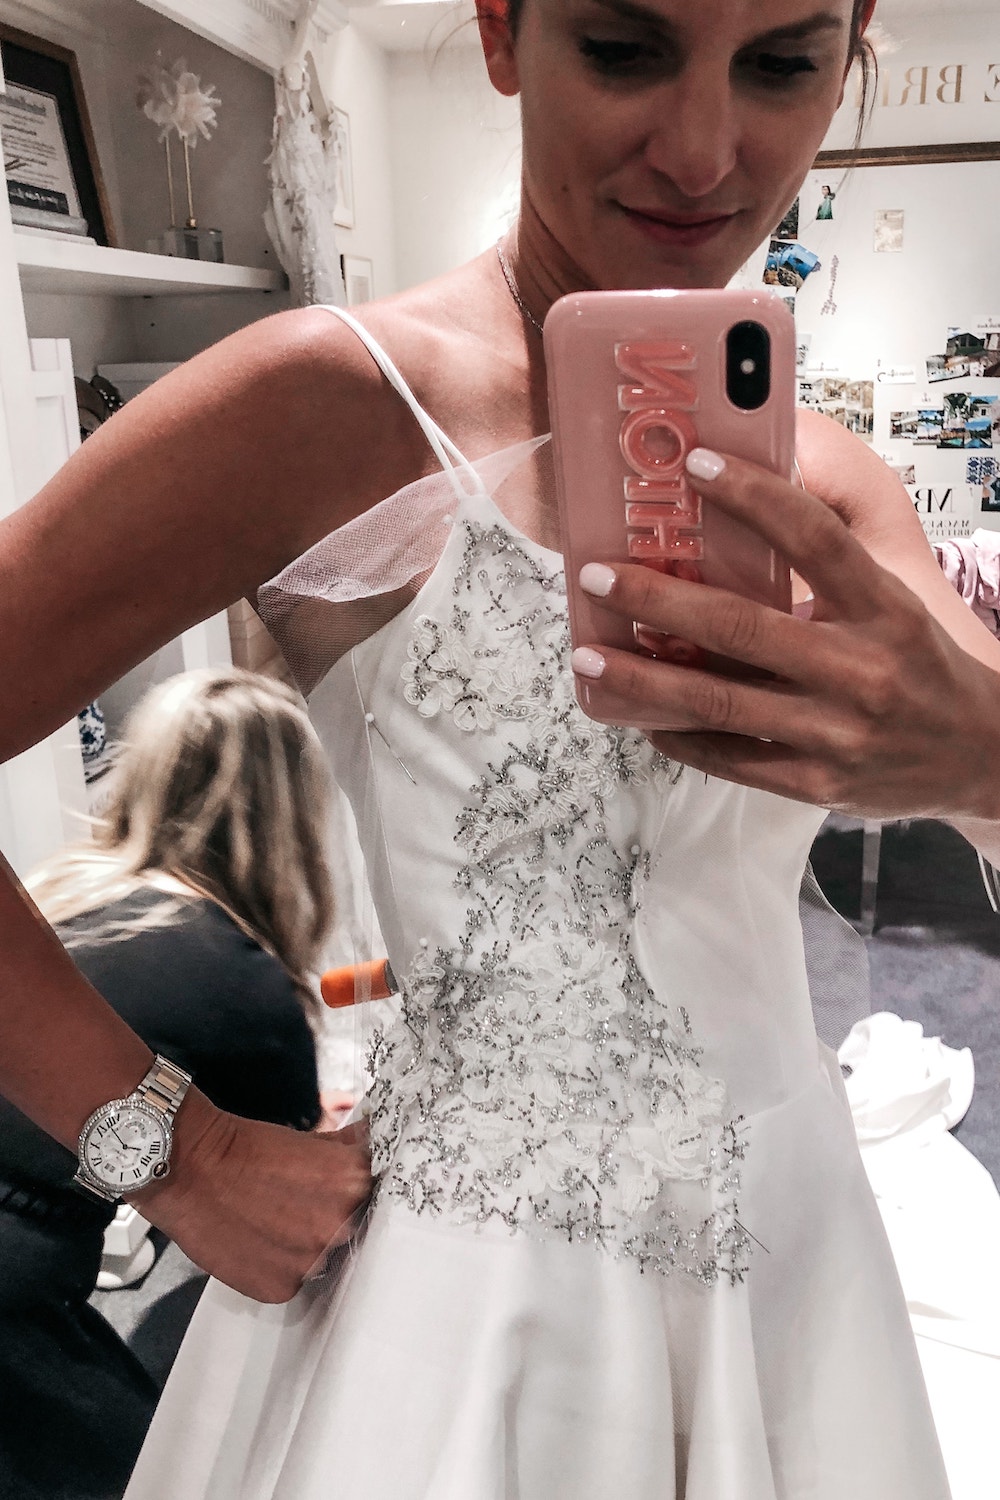
You can see the dress is coming together! I loved how everything turned out. In this photo, the lace is just loosely pinned on to give an idea of what it would look like. At this fitting, I decided to add more lace so it went down lower in the front. And then I added some to back as well. But overall, I loved the simplicity of the dress!
At this point, we decided to add some lace to the back of the dress and then added a little bit more to the front and sides.
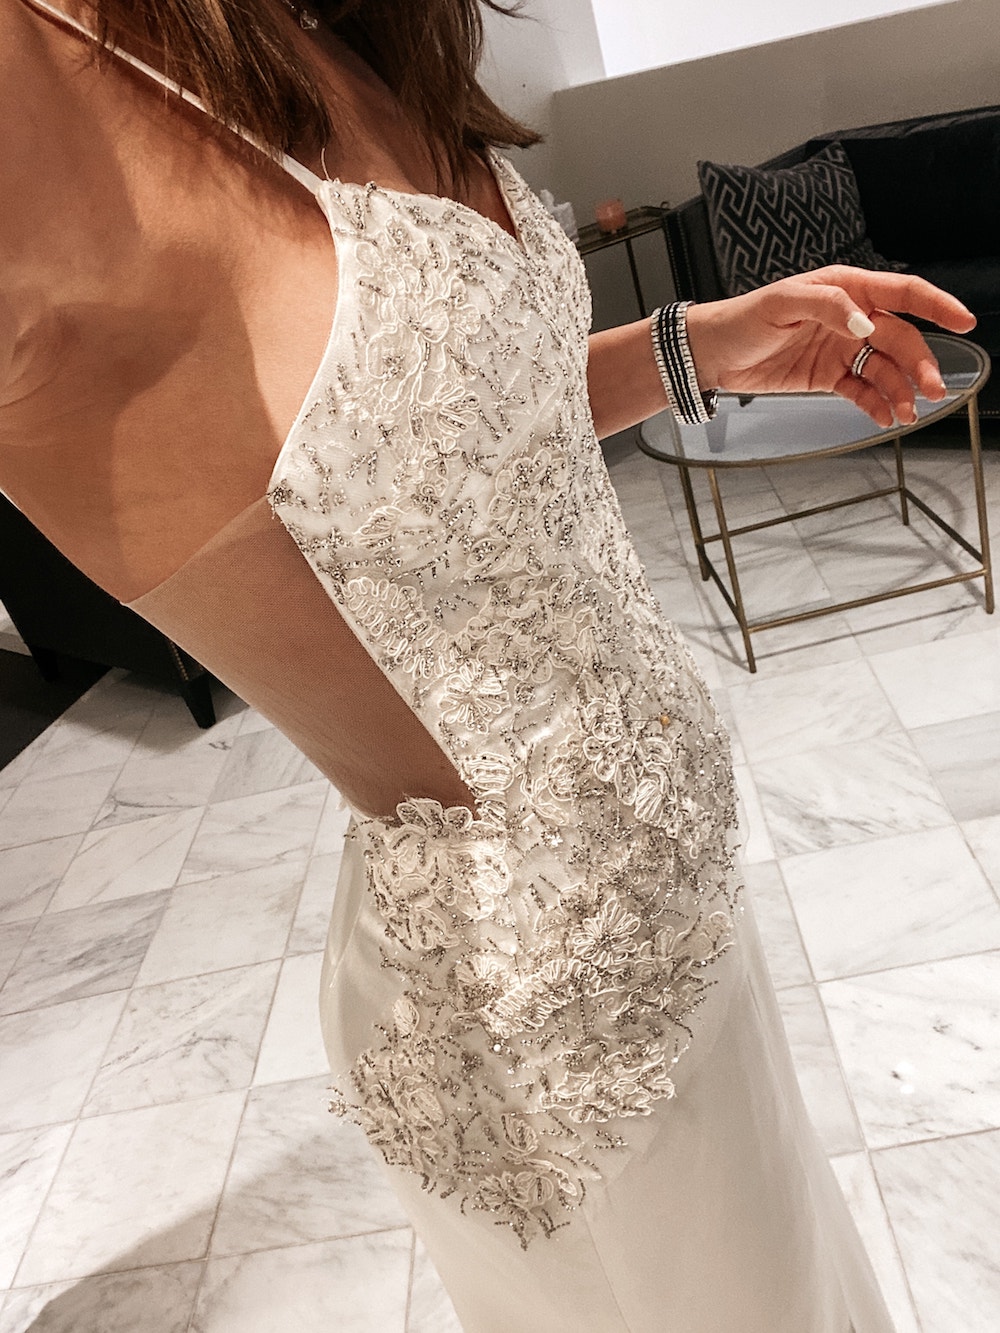
You can see in the image below but we placed some lace loosely just to see what it looked like and I loved it so we decided to add more!
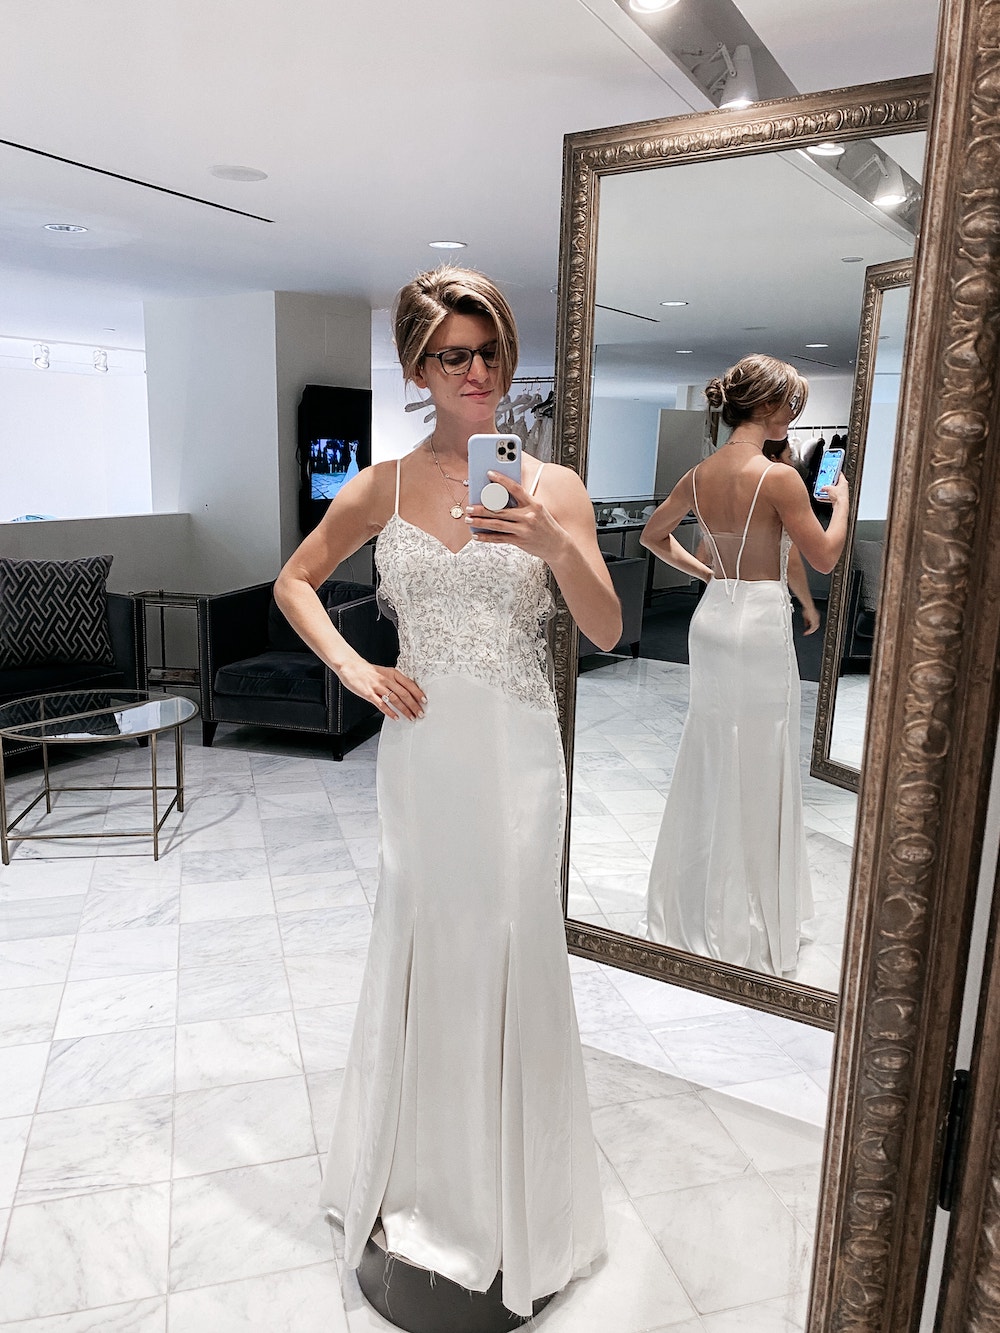
The Second Fitting // Final Look
Then basically all we needed to do was fix the hem so it’d be just right! Here’s how it turned out! I can’t get over the back – I love it!
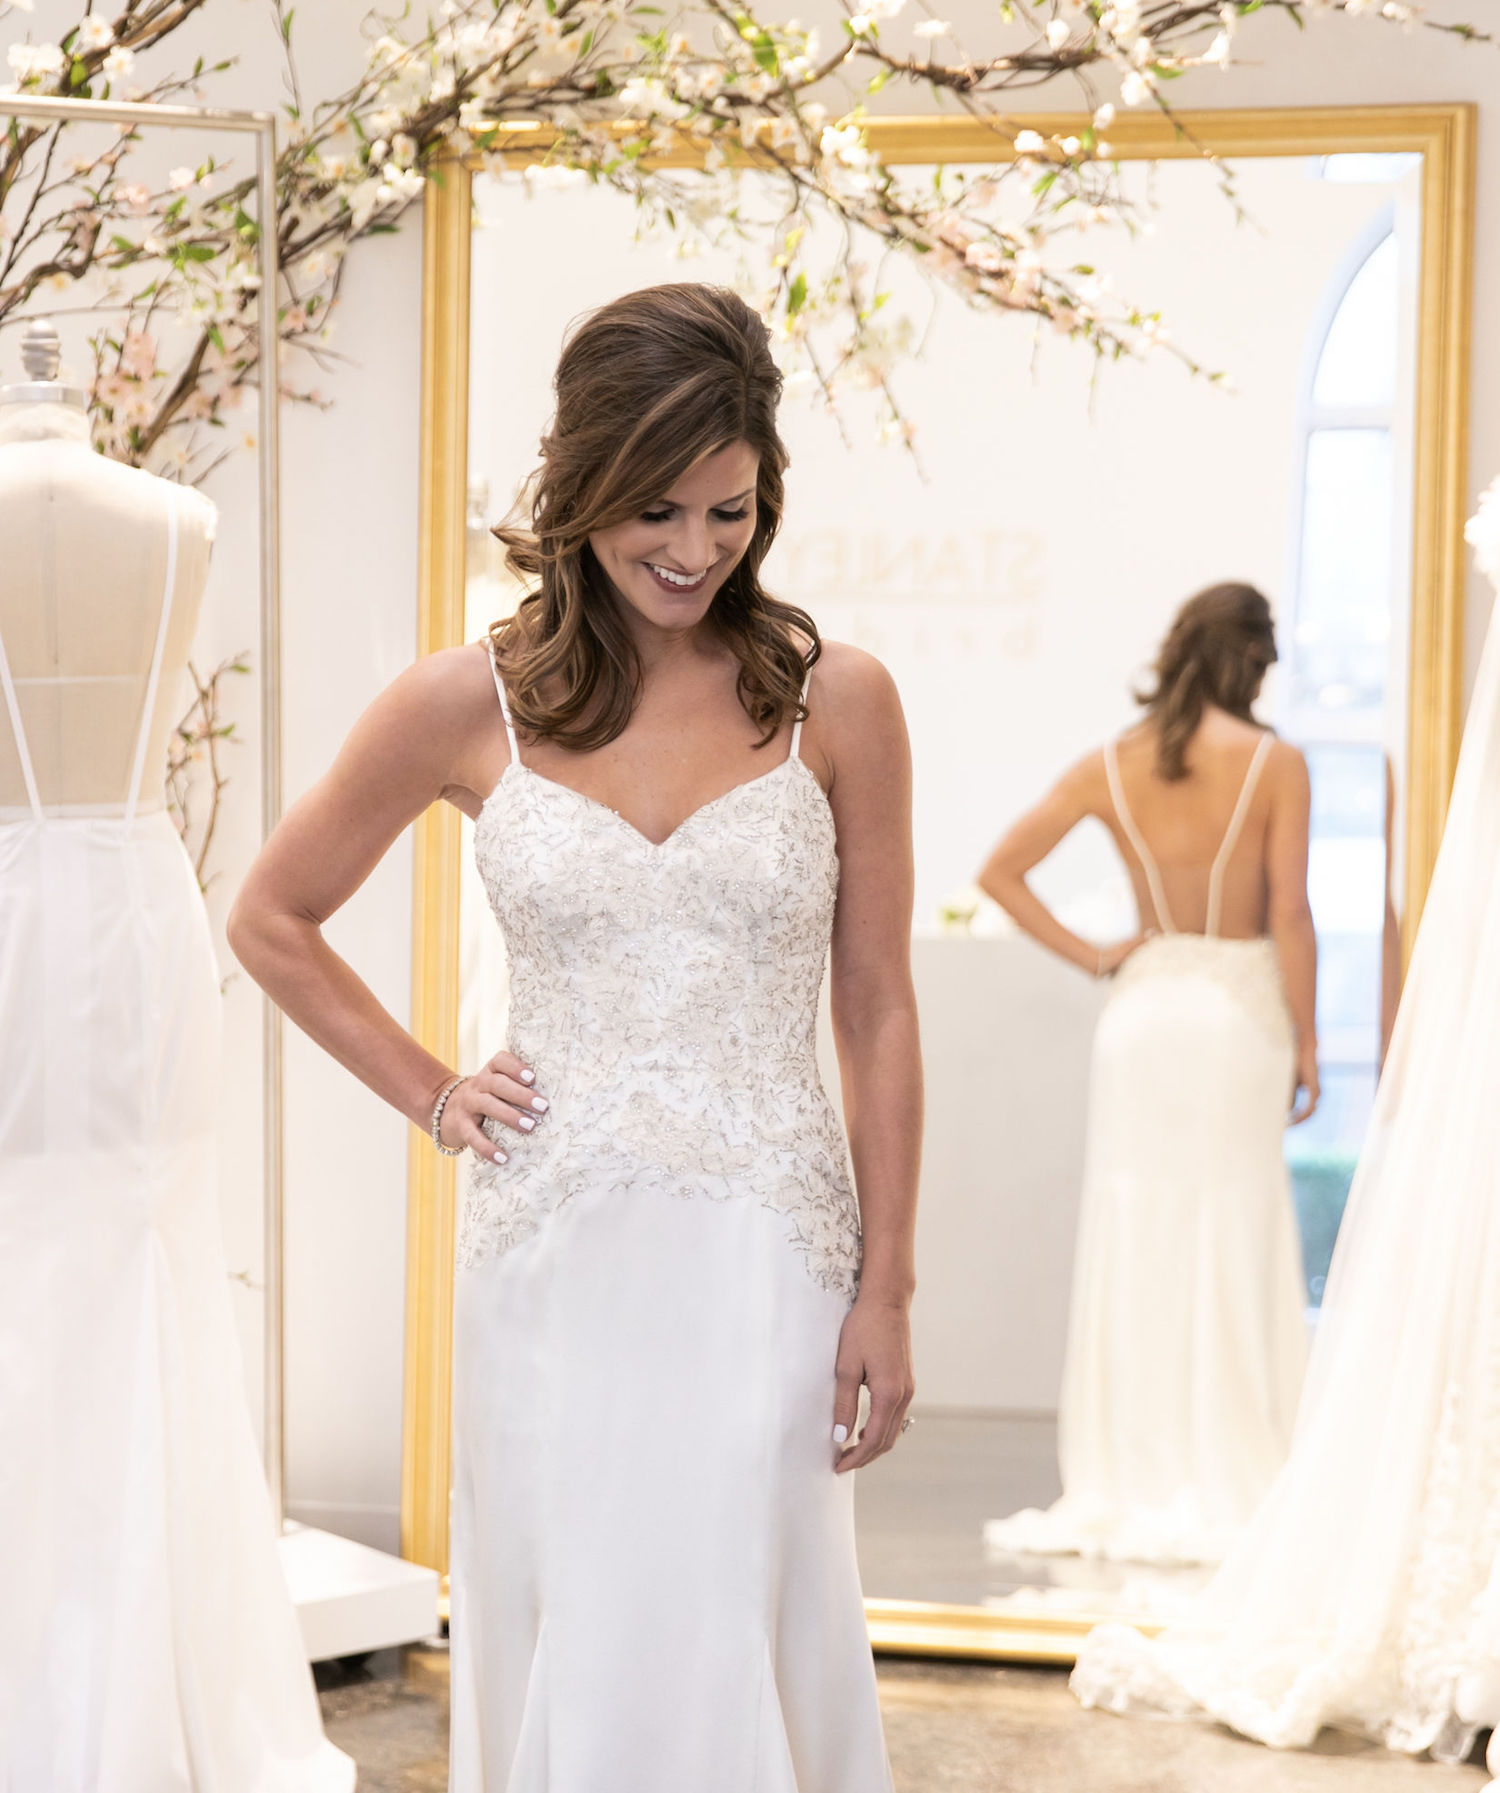
We took these photos while I was getting my final hem done! It’s pretty much all done though otherwise.
What do you think?
Brighton Your Day
Get exclusive content, sale items, and lots of fun stuff, straight to your inbox!
Share Story:
Join the Conversation
0 / View All